Appearance
Create product limit
Our Product Limit feature allows you to set a limit on the number of products available for sale on your website or in your store.
Setting a product limit allows you to manage how many of each product customers can buy. This helps you control inventory, prevent overselling high-demand items, and ensure all customers get a fair chance to purchase your products—especially during sales or promotions.
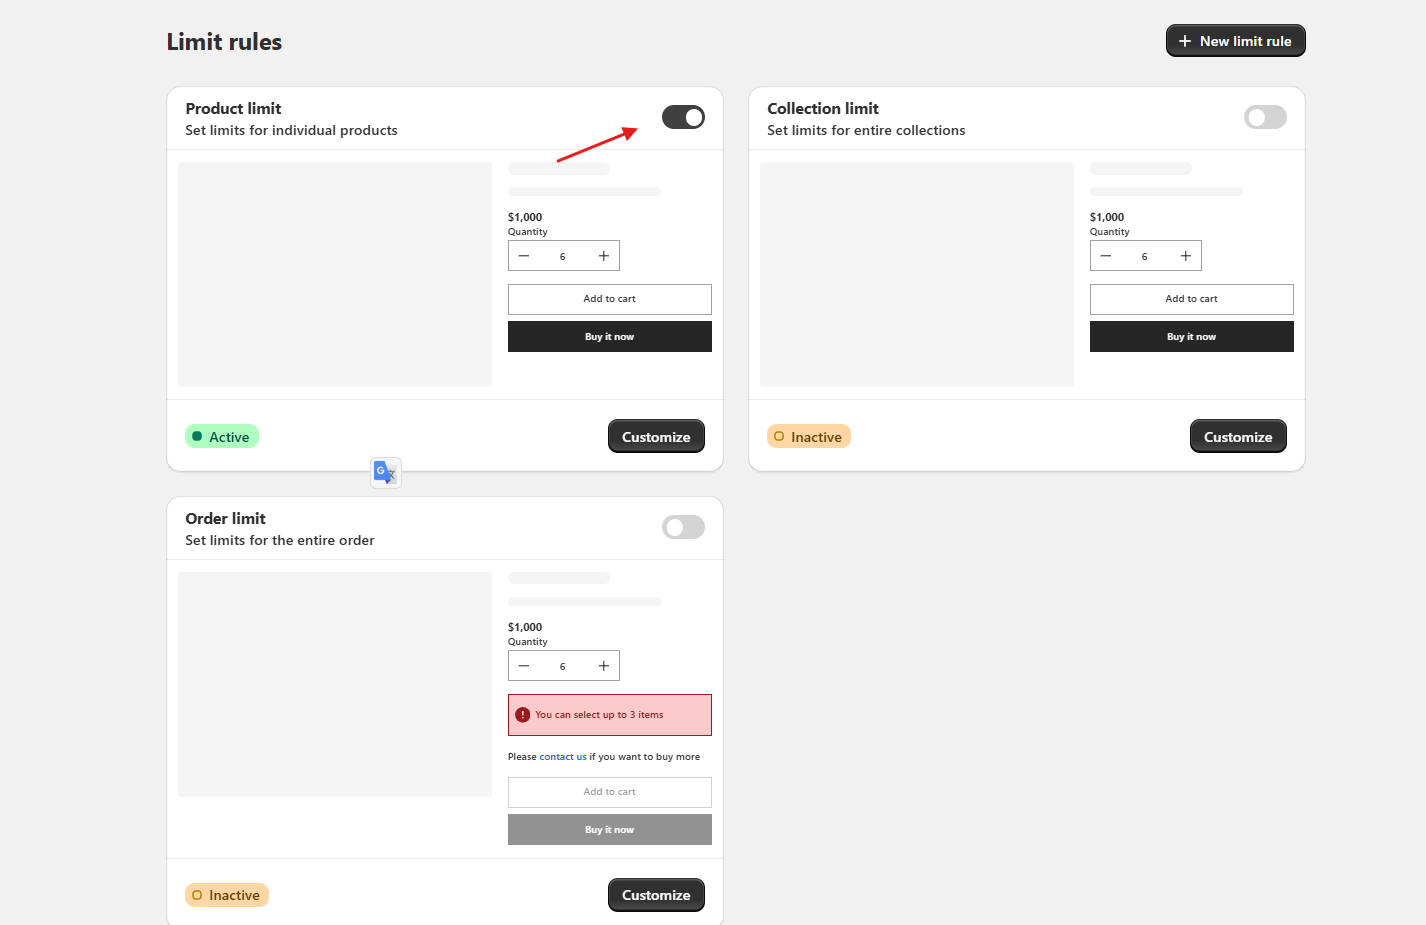
1. Open Limit rules and Add limit rule.
From the left-hand menu of the app, click Limit rules to open the list of your rules. Click + Add limit rule to open the limit type chooser.
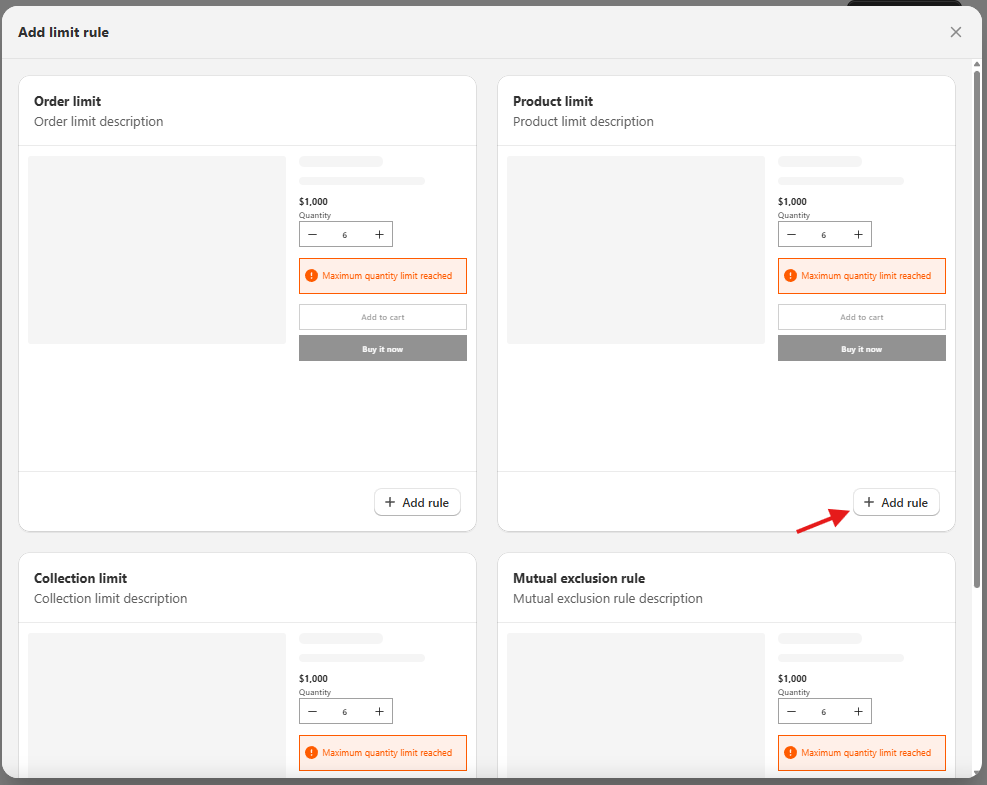
2. Choose the Limit type
On the limit type chooser, find the Product Limit card and click + Add limit.
This is the entry point for every product-level rule. Each rule is independent, so you can run several Product Limits at once with different conditions and date windows.
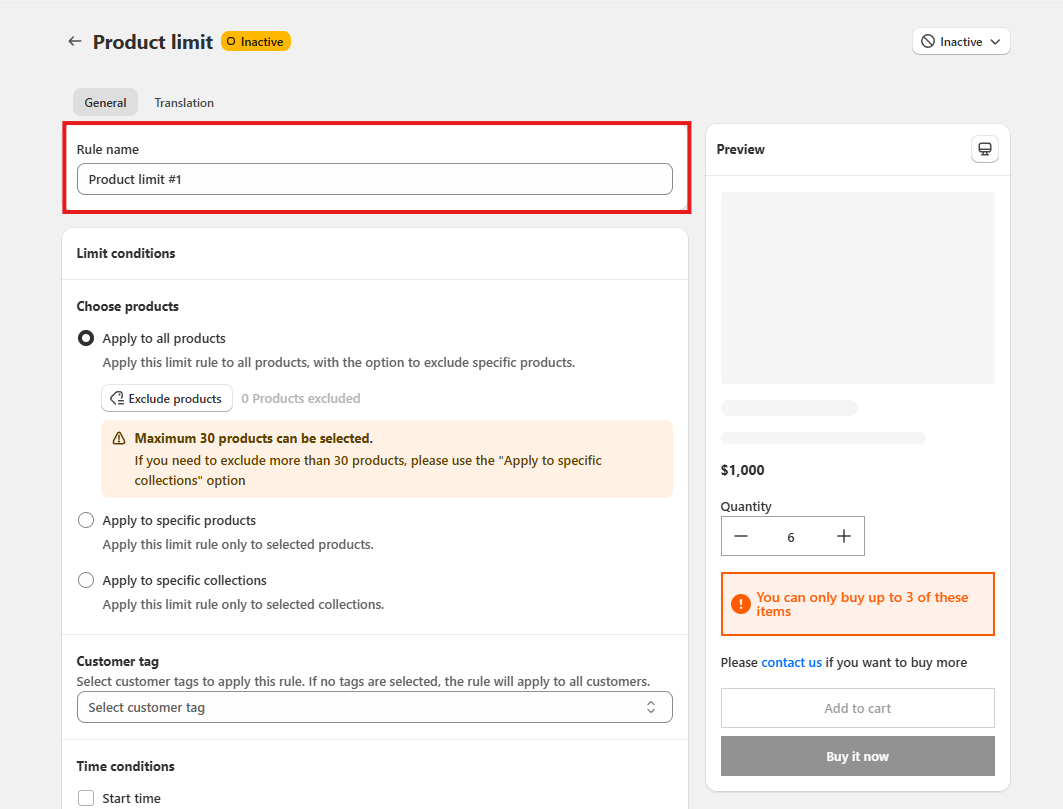
3. Name your limit
Enter a name in the Rule name field. This name is for internal use only — customers will never see it. Pick something that tells you at a glance what the rule does.
4. Select the products you want to apply the limit to
Under Choose products to limit, choose one of the three available options:
| Option | When to use |
|---|---|
| Apply to all products | Apply the limit to every product in your store. This is the best option when you want the same limit to apply across your entire store. |
| Apply to specific products | Apply the limit to selected products. You can choose up to 30 products per rule due to Shopify metafield limitations. To limit more than 30 products, create multiple rules. |
| Apply to specific collections | Apply the limit to all products in a selected collection. This option is recommended when you need to limit more than 30 products, as you can group the products into a collection instead of selecting them individually. |
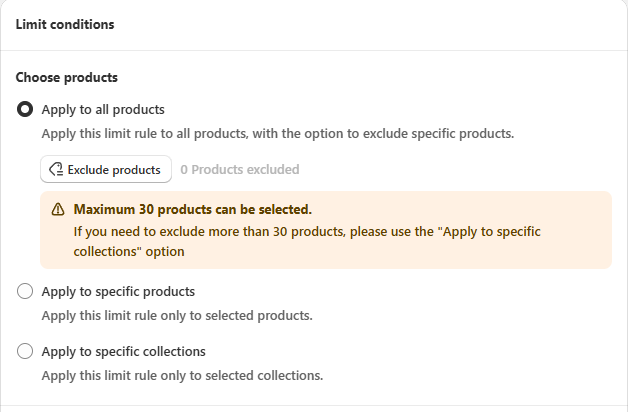
Exclude specific products
When you choose Apply to all products, you can exclude specific products from the limit rule.
- Click
Exclude products. - Select the products you don't want the limit to apply to.
- Click
Saveto confirm your selection.
The excluded products will not be affected by this limit rule.
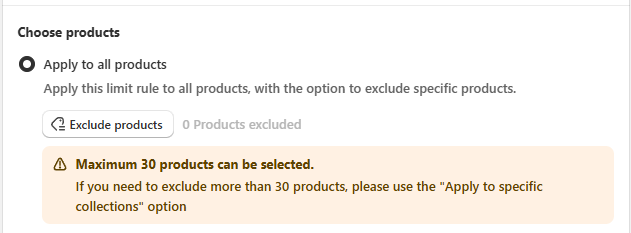
NOTE
You can exclude up to 30 products per rule. If you need to exclude more than 30 products, consider using Apply to specific collections instead.
Apply to specific products
Use this option when you want the limit rule to apply only to selected products.
- Select Apply to specific products.
- Click
Choose products. - Select the products you want to apply the limit to.
- Save the rule to apply the limit to the selected products.
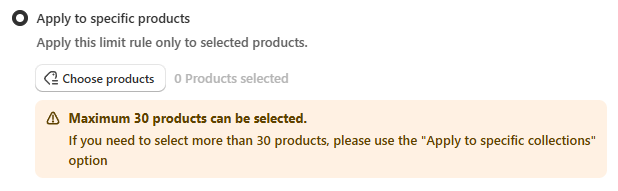
NOTE
You can select up to 30 products per limit rule. If you need to apply the limit to more than 30 products, please use Apply to specific collections instead.
Apply to specific collections
Use this option when you want the limit rule to apply to all products within one or more selected collections.
- Select Apply to specific collections.
- Click
Choose collections. - Select the collections you want to apply the limit to.
- Save the rule to apply the limit to all products in the selected collections.
You can also click Create a collection to create a new collection for the products you want to include in the limit rule.
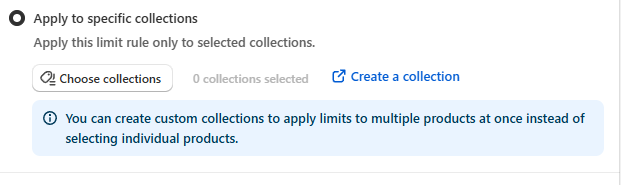
NOTE
This option is recommended when you need to apply a limit to more than 30 products. By using a collection, you can apply the limit to multiple products at once without selecting each product individually.
5. Customer tags
Select customer tags to apply this rule. If no tag is selected, the rule will automatically apply to all customers. 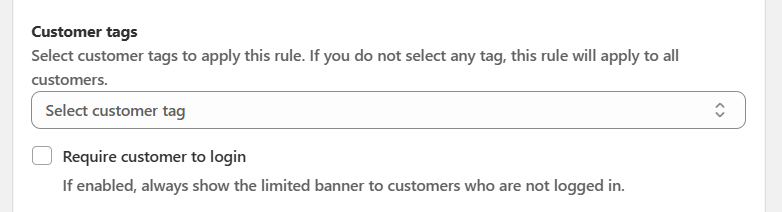
Select customer tags
You can apply a limit rule to specific customer groups by using customer tags.
- To use this feature, open the Select customer tag dropdown.
- Choose one or multiple tags from the list (for example: uppush, VIP).
- You can also create a new tag by typing it in the Add custom tag field and clicking Add.
- If no tag is selected, the rule will apply to all customers by default.
This feature is useful if you want to create special rules for particular customer segments, such as VIP members or wholesale buyers.
Example:
If you select the tag VIP, the rule will only apply to customers with the VIP tag, and other customers will not be affected. 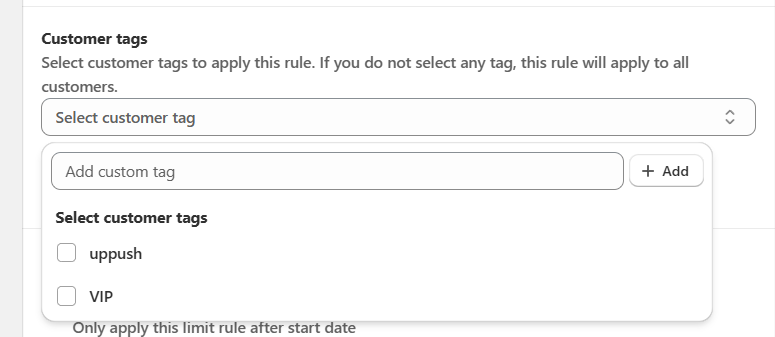
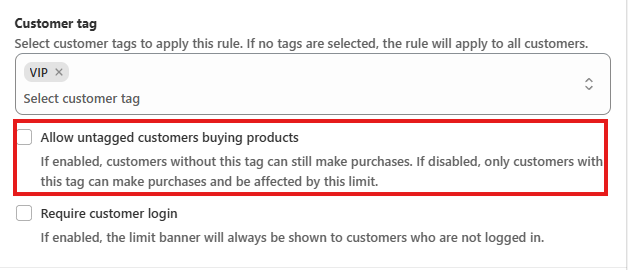
Allow untagged customers buying products
Enable this option if you want customers without the selected customer tag to still be able to purchase the products.
- Enabled: Customers with or without the selected tag can purchase the products.
- Disabled: Only customers with the selected tag can purchase the products and be affected by this limit rule.
NOTE
This option is useful when you want to apply the limit specifically to tagged customers while still allowing other customers to purchase normally.
Require customer to login
If this option is enabled, customers who are not logged in will always see the order limit banner. This ensures that your rules are consistently enforced, even for visitors who have not created or signed into an account. 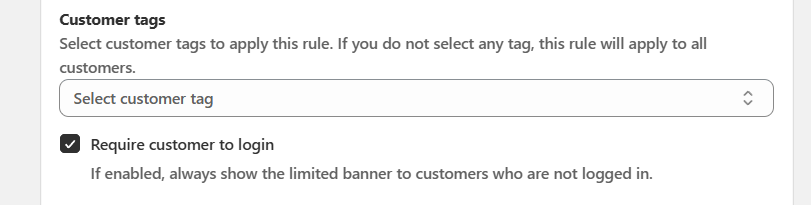
6.Time conditions
You can control when a limit rule becomes active by setting start and end dates.
- Start date: The rule will only apply after the specified start date.
- End date: The rule will only apply before the specified end date.
This feature is useful for time-based campaigns, promotions, or seasonal restrictions. 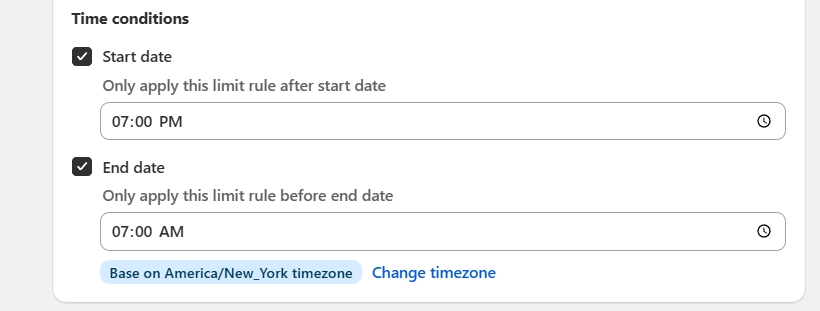
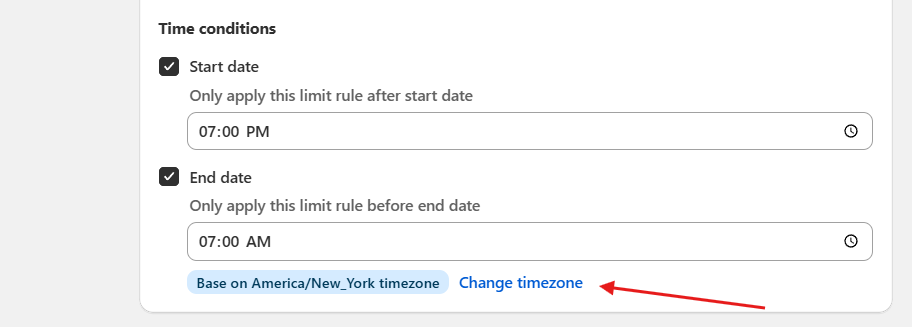
Change timezone
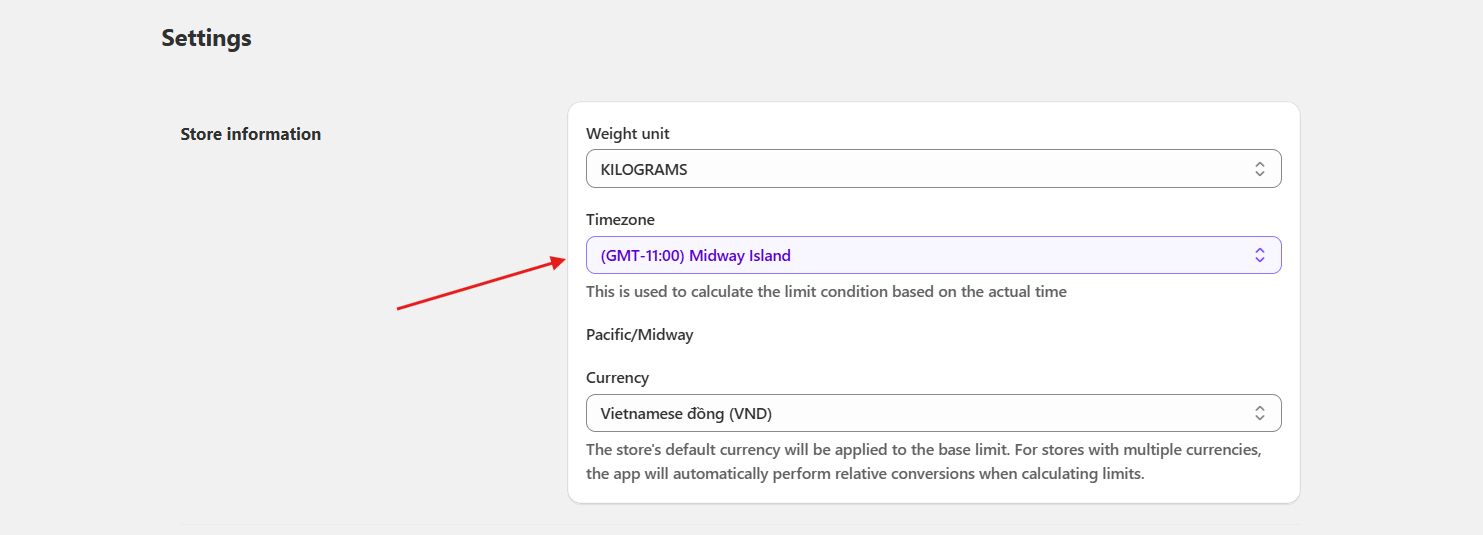
When you click on Change timezone, you will be redirected to the Settings page of the Uppush Order Limit app. From there, you can select the correct timezone for your store.
This setting ensures that all time-based limit conditions (such as start date and end date) are calculated according to the actual local time of your store.
7. Limit Rules
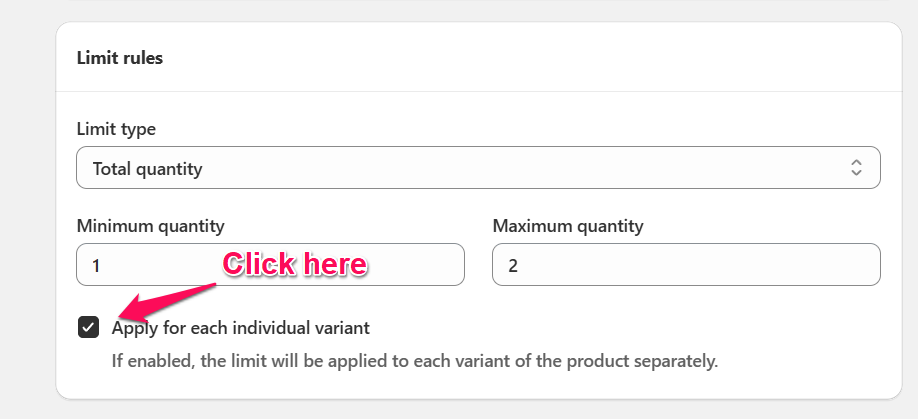
Set up the different Limit conditions on your own by following the below instructions:
Limit type Choose how you want the rule to apply:
- Total quantity: Limit based on the total number of items in the cart.
- Total value: Limit based on the total cart value (currency).
- Total weight: Limit based on the total weight of items in the cart.
Maximum quantity Set the maximum allowed amount for the chosen limit type. Example: maximum 10 items per order.
Minimum quantity Set the minimum required amount for the chosen limit type. Example: customers must buy at least 2 items.
Apply to each variant If enabled, the limit rule will be applied separately to each product variant instead of combining all variants of a product.
8. Behavior limit
The behavior limit settings define how and when the rule is enforced for customers. 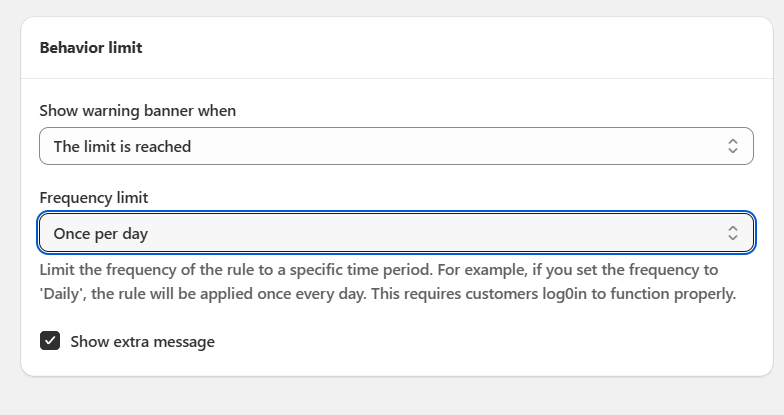
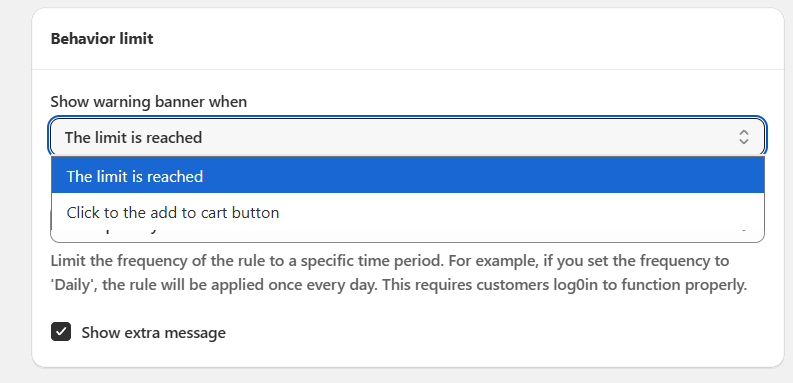
Show warning banner when
Choose when the warning banner should be displayed to customers. You can select one of the following options:
The limit is reached The banner will appear as soon as the customer reaches the defined limit.
Click to the add to cart button The banner will appear immediately when the customer clicks the Add to cart button, even if the limit has not yet been reached. This option is useful if you want customers to be reminded about limits before adding items.
Frequency limit
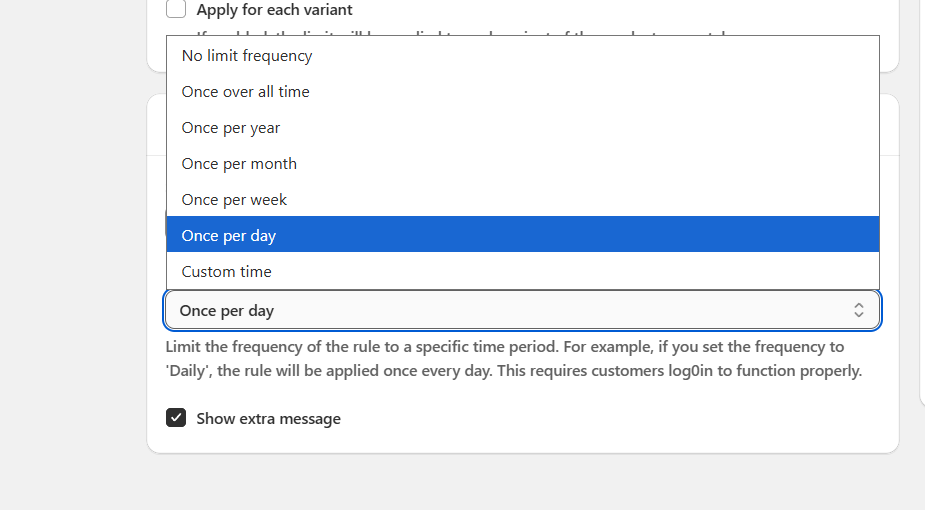
The frequency limit allows you to control how often a rule is applied within a specific time frame. This ensures customers cannot repeatedly bypass your rule.
Available options:
- No limit frequency: The rule applies every time without restriction.
- Once over all time: The rule applies only once per customer, ever.
- Once per year: The rule resets every year.
- Once per month: The rule resets every month.
- Once per week: The rule resets every week.
- Once per day: The rule resets daily, applying once per customer per day.
- Custom time: Define a custom time range (e.g., every 12 hours, every 3 days).
Important
Frequency limit only works on store pages. It does NOT work in Checkout Validation because Shopify does not provide the customer's last order data during checkout.
To ensure the frequency limit works correctly, customers must log in to the store before reaching the checkout page.
When testing on a development store, frequency-based rules may also not work as expected. This is normal behavior and not an app issue.
Show extra message
Enable this option if you want to display an additional message below the main warning banner. This extra line can be customized to provide more details or instructions for customers. 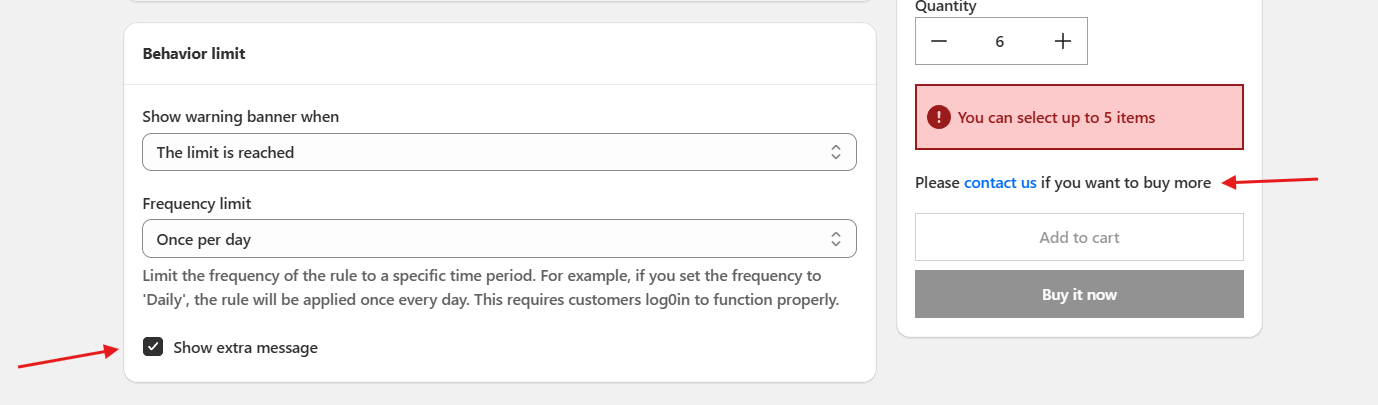
Extra message customization
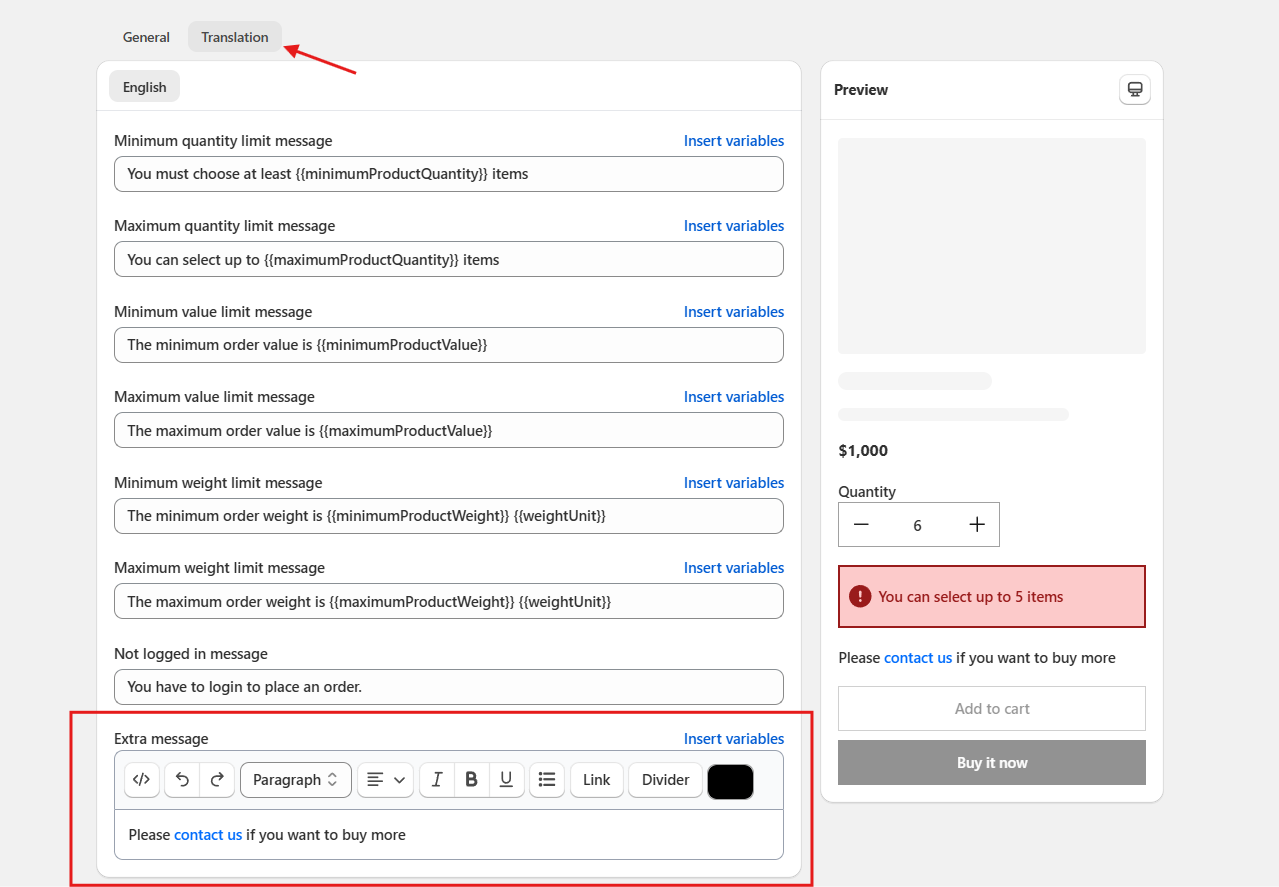
You can edit and customize the extra message shown below the warning banner. This allows you to provide additional instructions or helpful links for your customers.
To customize:
- Go to the Translation tab.
- Scroll down to the Extra message field.
- Enter your custom text, add links, or format the message as needed.
- Click Save to apply the changes.
9. Activate the limit rule
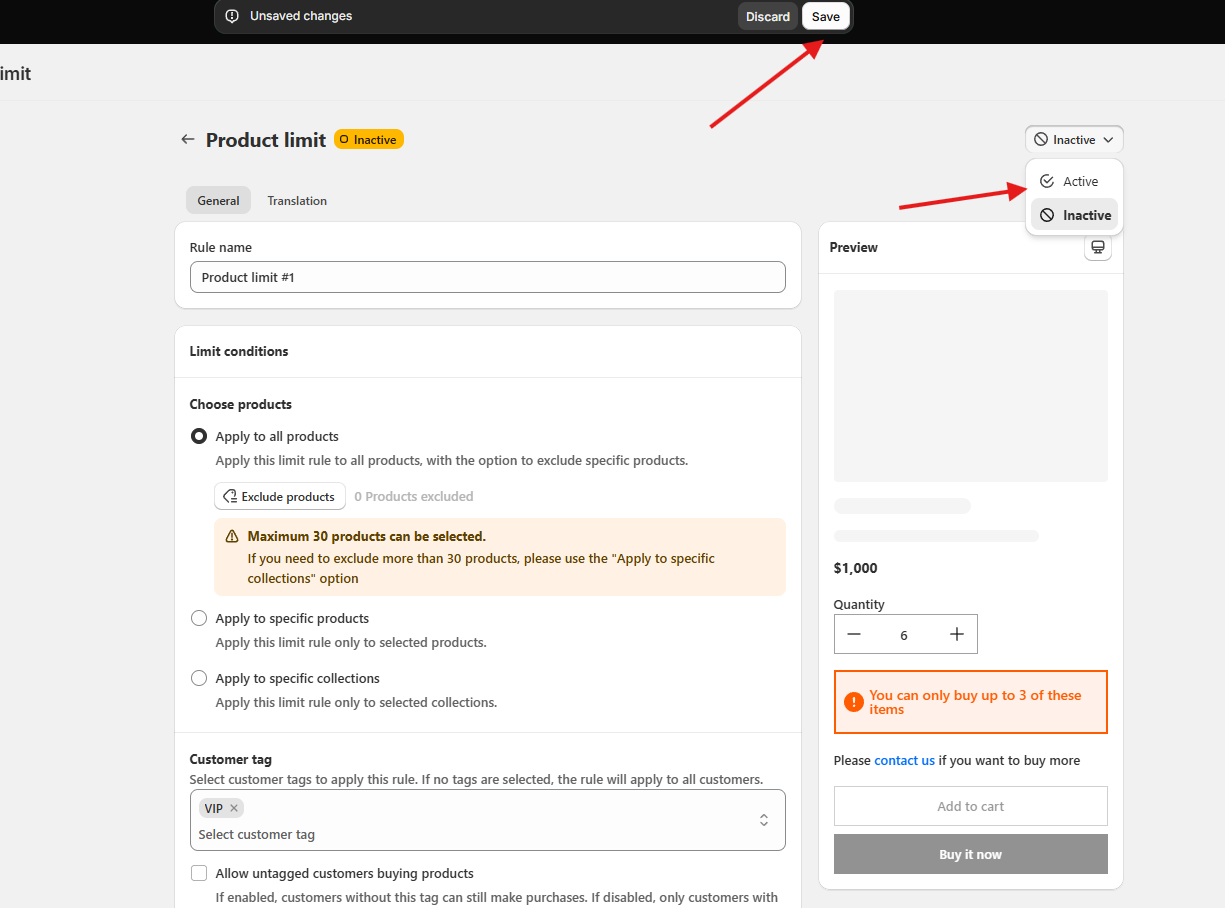
After completing all the limit rule settings, click Save to save your changes.
Then, switch the rule status from Inactive to Active to enable the rule.
Once activated, the limit rule will start applying to your selected products and customers.